| Pantry before and after |
As you might know, one of my resolutions this year was to organize my pantry. I thought I would go over with you from start to finish how I went about doing it in case you are thinking about doing this too.
At the start of a project, the first thing I do is take a look at the space that I'm working with and see what is working and what isn't. The most important thing in ANY room is that it functions. You might have seen my previous post, "The Good, The Bad and the Ugly", where I made a list of the things that needed to be addressed in the room. Let's see if I managed to do everything on my list....Goals for the pantry
1. Containers for keeping "like" things together
 |
| Glass containers and labels from World Market Candy jars from Target |
2. better looking trash cans (mark one for recycle)
 |
| Recycle trash in the pantry ~ The Container Store Galvanized Bin $59.00 |
 |
| Regular trash under the sink ~ The Container Store pull out bin $49.00 |
3. use the door for storage too in some way
 |
| Anthropologie Silver Spoon Door hanger and Apron $ 44.00 total |
4. maybe hang baskets from ceiling?
 |
| See blog post "DIY Pantry Hanger" |
5. paint/ wallpaper or both
6. address ugly light fixture
 |
| El Paso Import Co. light fixture $120.00 |
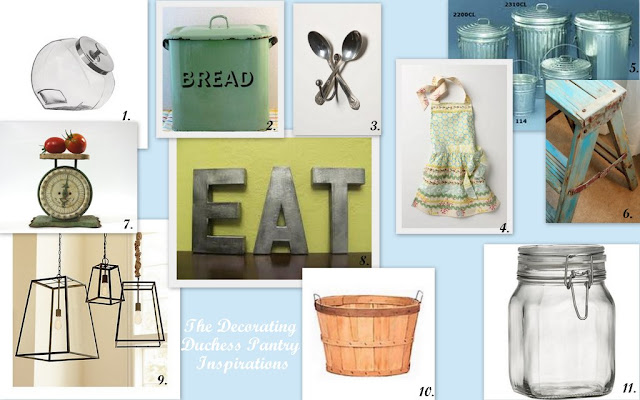
You can see that I used some things exactly as they are shown and other things are just an idea of what I ended up doing such as the EAT letters became a DIY Market sign, the step stool ended up being a re purposed kid's bench and the light fixture changed when I found that great fixture from El Paso Import Co.
 |
| See blog post "DIY Market Sign" to make this for yourself |

The Budget, as always was next to nothing. I wanted to stay under $300. Let's see how I did...
Light fixture $ 120.
Trash bins $ 108.
Glass, plastic and other containers and labels $150.
Bushel baskets $24
Paint $15 (I used what I had except for the yellow enamel)
Anthro Apron $24.
Anthro Hook $ 20.
Hand made sign and ceiling hooks $20.
Total $ 482.00. Ooops. There is a lesson here. Take your budget and almost double it ~ this always happens.:( Of course I don't really count the Anthro stuff because I used my Christmas gift certificate and the light fixture was my Valentines' Day present. Yes, my husband knows me well.
The next step is to get rid of old out of date items or things that you don't need. Basically, clean it all out. Once everything is out of the pantry, you can paint. I chose white walls to keep it light and bright because I knew that changing the light fixture was going to make it a little darker. I painted the bottom shelves that are deeper the same dark grey as my kitchen cabinets (Sherwin Williams Black Fox) and the upper shelves are my kitchen wall color in an enamel paint. (Sherwin Williams Mannered Gold) I decided to paint the ceiling a turquoise, just because I can. :) Small areas like this are a great place to just go for it.
After the paint dried and I started to put everything back, I tried to keep all of the "like" things together: baking, breads, pastas and rice, canned goods,etc.
Once I did this, I knew how many canisters and baskets I needed. I know I have a lot of chips and snacks. (Don't judge.) Dr. Oz would not approve but that's another blog...By the way, when I was checking out other pantries, I think they are hiding some stuff because there was a shocking absence of processed foods!
When planning out where everything was going to go, I actually did move some things out of the pantry, mostly the healthier stuff like fruits and veggies where they are easier to grab...now Dr. Oz is proud!
 |
| Fruit is great to display and easy for the kids to grab. |
 |
| You have to always have the fixin's on hand for guacamole in Texas, just sayin'. |
 |
| Oils and sauces by the cook top make them handy. |
| This cabinet came from El Paso Import Co. I thought that it would be great for storing spices close to the cook top. |
Sharing with ~ www.jenniferrizzo.com
 |
| theshabbycreekcottage.com |
 |
| www.savvysouthernstyle.net |


No comments:
Post a Comment
Hi. Thank you for visiting! Please feel free to leave any comments and share if you have a fun and similar project going on. Also, I am happy to answer any questions that you might have regarding tutorials or sources for decorating. I love making new friends who share my love of design, so don't be shy! You can also join me here and on other social networks on the right sidebar of this blog. Have a fabulous Day!