 |
| Before |
 |
| After |
After all of the fretting over the laundry room light fixture, I decided that I just wasn't going to have enough light in there if I changed out the fluorescent light for a prettier chandelier or lantern. The deal was sealed when I was watching Vanderpump Rules. (I really don't want to admit that I've watched any of those but I am a Real Housewives fan so I thought I'd check it out ~ Don't judge) You never know where inspiration is going to come from.
I have always thought that Sur Lounge was decorated beautifully and when I saw these beauties I thought maybe I could do a knock off version for a rectangular light. I have also always admired the casual chicness of the drum lights at Anthropogie so I thought I'd try it.
What you'll need:
I bought this at home Depot. It was around $8.00 for 10' and I bought 2 for a 48" light fixture. |
| These needle nose pliers also have a built in wire cutter but honestly I could have used a better wire cutter than this. |
This was the paint I used which is great and really makes it look like metal!
I used a white linen for the fabric which I new would be sheer enough to let plenty of light through.
I used metal ez anchors and cup hooks. When you buy the cup hooks make sure the threads of the screws are the same size as the ez anchor.
Step one ~ Cut wire for desired design
I stripped down the wire for a more modern look but if you like the wire design as it comes you can skip this part. It took a while because the wire cutters that I used where not the best and some of the wire ended up breaking in the wrong spot because of it so for an easier job make sure you have good ones. (Note: Wire hangers are the same width so if you need to add any wire to this you can.)
Step 2 ~ Paint metal
Paint your cage (You can skip this step if you want to keep it white. I personally think the metal looks better.)
Step 3 ~ Lay out cage and measure
Lay out your design. The cage will end up being larger than the light because you do not want to break up the arch pattern. My light is 48" but the cage ended up being 72 an 1/4 ". Once you lay it out on the floor measure the length and width so you can mark your ceiling for hooks in the four corners.
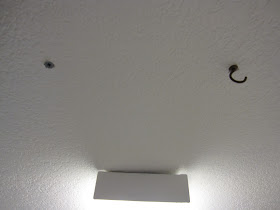
Step 4 ~ Install Ceiling Hooks
Measure and hang your ceiling hooks. You will do this in four corners to hang the cage. I painted them the ceiling color after hanging.
Step 5 ~ Hang Cage
 |
| Bend the four corners to hang on the cup hooks. |
Step 5 ~ Cut and sew fabric
I left the raw edge of the fabric because I thought it looked great for this type of shade. Then I hemmed the top edge and sewed together the four sides of fabric.
Step 6 ~ Hang Fabric
I hand sewed the fabric to the ceiling hooks. Make sure you pull the fabric tightly so there is no sagging.
I much better view! I spent $24.00 on this project buying the metal and the spray paint. I already had the fabric, ez anchors and cup hooks left over from a previous project. If you have to buy everything this should still be only around $50. Well worth the time and effort if you ask me. Now the laundry room is almost complete with just a few minor details so stay tuned for the final reveal.
Sharing with ~
www.theshabbycreekcottage.com


No comments:
Post a Comment
Hi. Thank you for visiting! Please feel free to leave any comments and share if you have a fun and similar project going on. Also, I am happy to answer any questions that you might have regarding tutorials or sources for decorating. I love making new friends who share my love of design, so don't be shy! You can also join me here and on other social networks on the right sidebar of this blog. Have a fabulous Day!